


Imagine this scenario: you’re comfortably settled at home, savoring the perfect indoor temperature your Honeywell thermostat has been maintaining flawlessly.
But then, out of the blue, you notice something’s amiss – the temperature reading remains stagnant, the HVAC system seems unresponsive, and panic starts to set in.
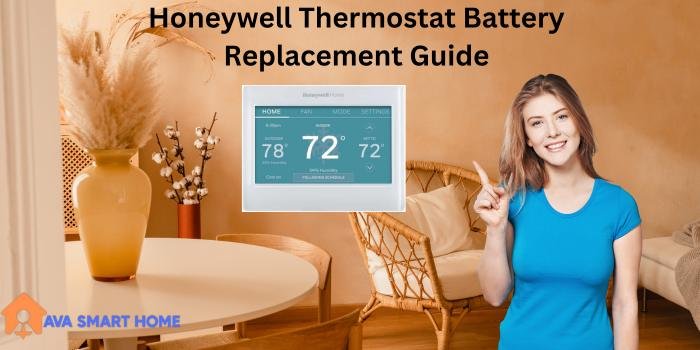
Fret not! In this comprehensive guide, we’ll delve into the common issues causing your Honeywell thermostat to malfunction and provide you with actionable solutions to get it back on track.
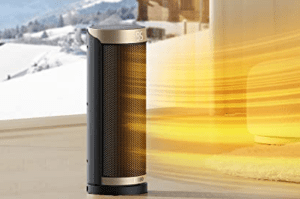
Related: Top 5 Best Vornado Heaters Reviews and Guide
Honeywell Thermostat Not Working: Troubleshooting and Solutions
Honeywell thermostats have earned a reputation for their reliability and cutting-edge technology. They play a crucial role in regulating indoor temperatures, enhancing comfort, and promoting energy efficiency. However, even the best devices can encounter issues over time.

Is your Honeywell Thermostat Suddenly Acting up?
Don’t panic! Let’s tackle the issues together:
1. Blank Display? Check the power connection, and circuit breaker, and replace batteries.
2. Temperature Mismatch? Reposition the thermostat away from drafts for accurate readings.
3. Unresponsive Touchscreen/Buttons? Reboot and update firmware from Honeywell’s site.
4. HVAC System Silent? Review settings, circuit breaker, furnace switch, and filters.
5. Constant Cycling? Clean filters address refrigerant leaks or wiring problems.
6. Wi-Fi Issues? Strengthen Wi-Fi, and consider router relocation.
7. No Heating/Cooling? Check mode, and seek professional HVAC help.
8. Delayed Response? Clean and update firmware regularly.
9. Battery Woes? Replace batteries, and monitor battery indicator.
10. Regular Maintenance Matters Clean, inspect, and lubricate for prolonged efficiency.
11. Seek Professional Assistance Call experts for intricate issues.
12. Consider an Upgrade Explore newer models for enhanced features.
Keep your cool – follow these steps to regain control over your Honeywell thermostat!
Get the deal 5 Best Programmable Thermostat Under $50
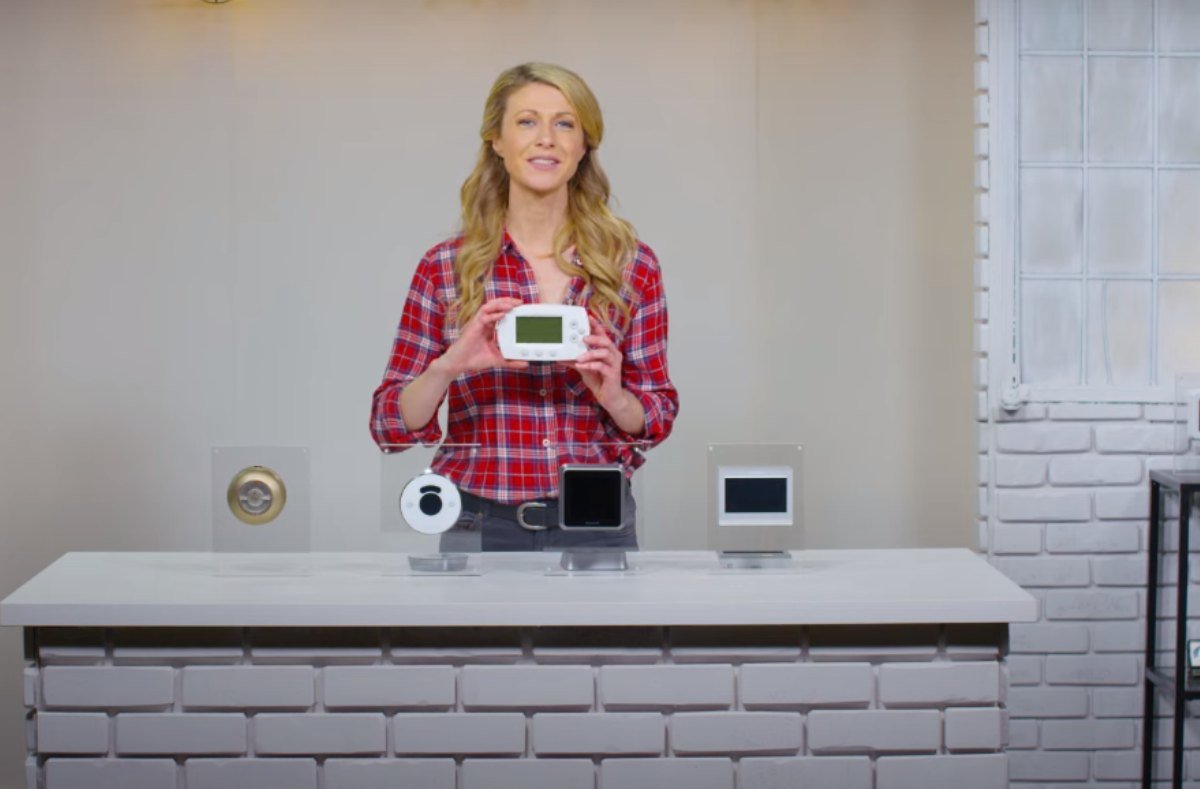
Honeywell thermostats come in a wide variety of models, ranging from the basic 1000 series to their most advanced T10 model.
With such a diverse product range, I understand that finding the appropriate battery replacement instructions can be a challenge. While the process is similar across models, there are certain differences to consider.
In this guide, I offer instructions for each specific model type.
General Instructions
Honeywell thermostats usually consist of a base plate and a cover plate, both attached to the wall. In general, to change the battery, you’ll need to turn off the power to your thermostat, remove the cover plate, and replace the old batteries.

It’s important to note that not all Honeywell thermostats require batteries. However, if your thermostat features an LED display, it’s likely to need batteries.
Like any device powered by batteries, it’s necessary to change the batteries periodically to maintain optimal performance.
Most Honeywell thermostats typically need a battery replacement once a year. When the “Battery/Batt Low” indicator appears, you have around 60 days to change the batteries before the device stops functioning properly.
Safety Precautions & Equipment Needed
We always advise readers not to attempt any task they are not confident in performing. If you’re uncertain, it’s best to seek professional assistance.
Before replacing the batteries in your Honeywell thermostat, I recommend taking necessary precautions to ensure safety.
Familiarize yourself with the required battery type (usually AA or AAA alkaline batteries) and the correct quantity needed for your specific model.
It’s crucial to match the battery polarity with the markings on the battery compartment to avoid damaging your thermostat.
I’ve compiled a helpful list of popular Honeywell thermostat manuals to help you identify whether your device requires batteries and the appropriate type to use.
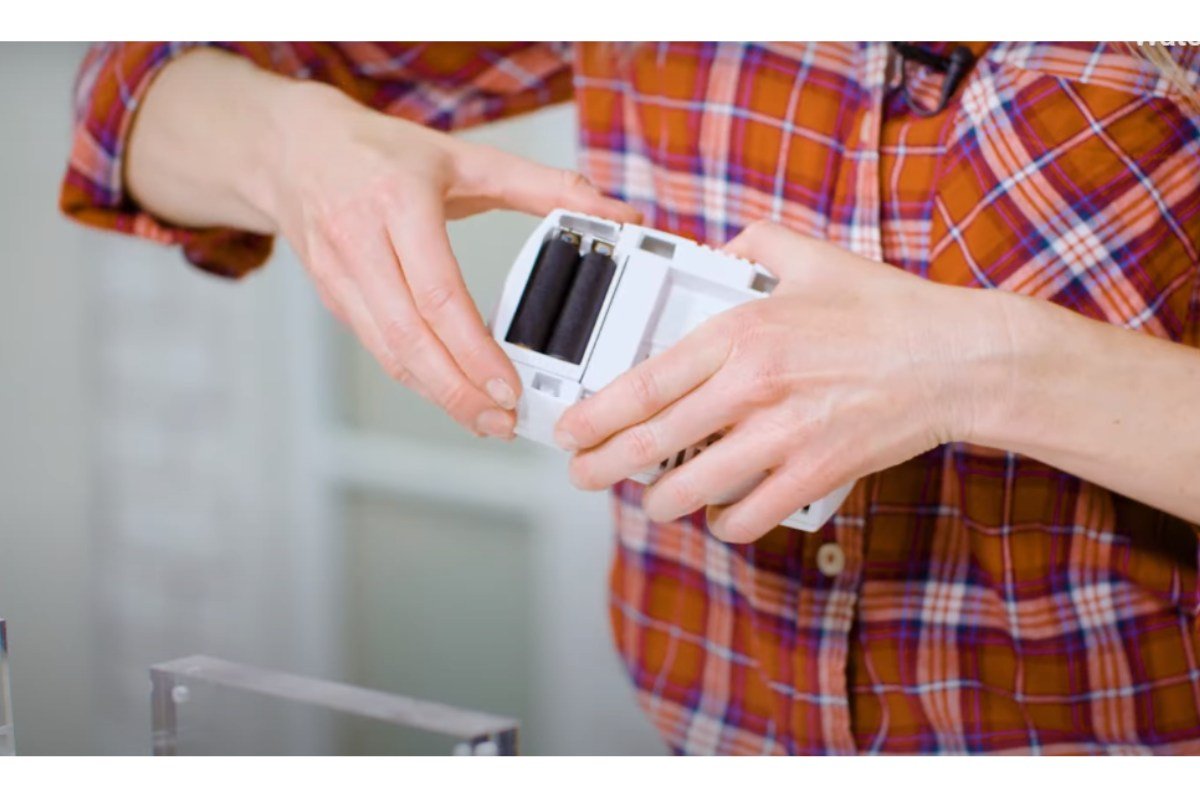
Replacing Batteries
For thermostats with a non-sliding compartment, replacing batteries is straightforward. While thermostat wiring is typically 24 volts (in the US), I recommend starting by turning off the power supply to the thermostat to prevent potential electrical hazards.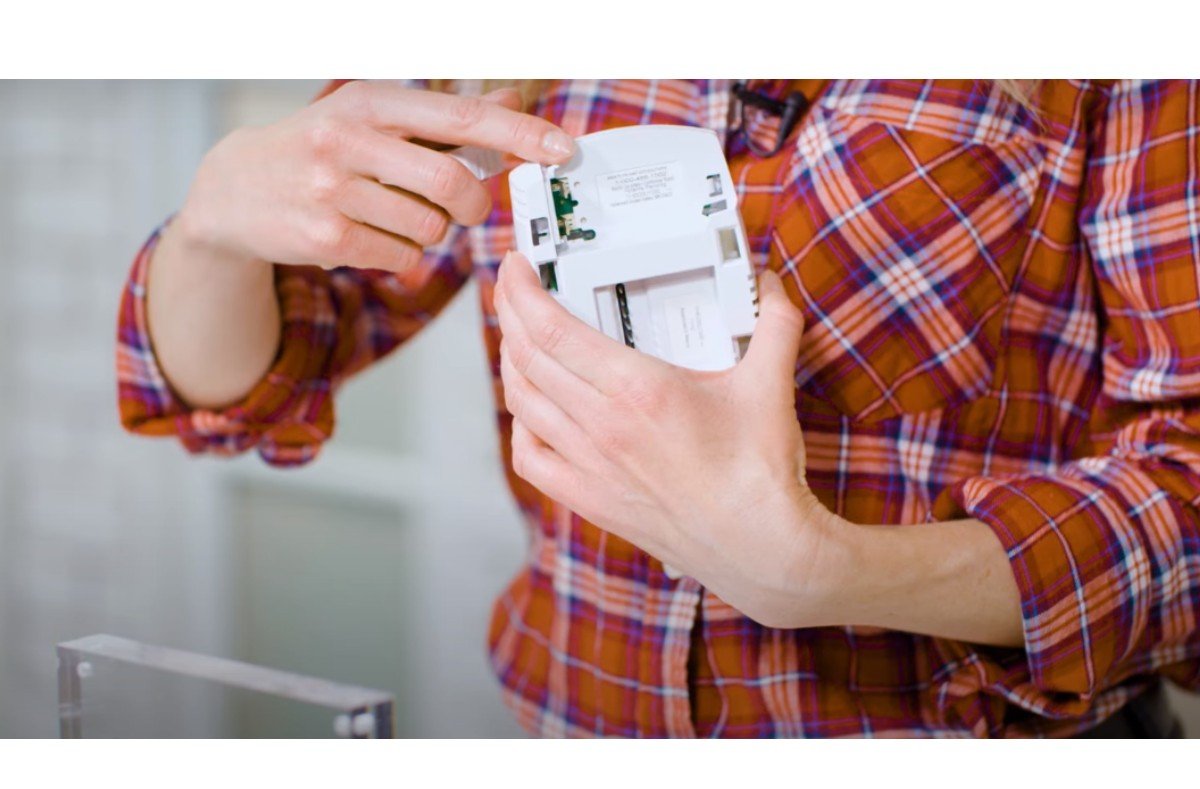
To access the battery compartment, gently pull the cover plate away from the bottom, wiggling it if needed, until it detaches from the base plate.
In some cases, you might need to remove a small screw at the base before separating the plates.
Always exercise caution while removing the cover plate to avoid damaging pins or clips.
Finding the Model Number
Generally, your thermostat’s model number can be found on the front of the device, accessible through the digital interface, or printed on a label at the back. I’ve included images and diagrams in the model-specific instructions below to help you identify the correct model.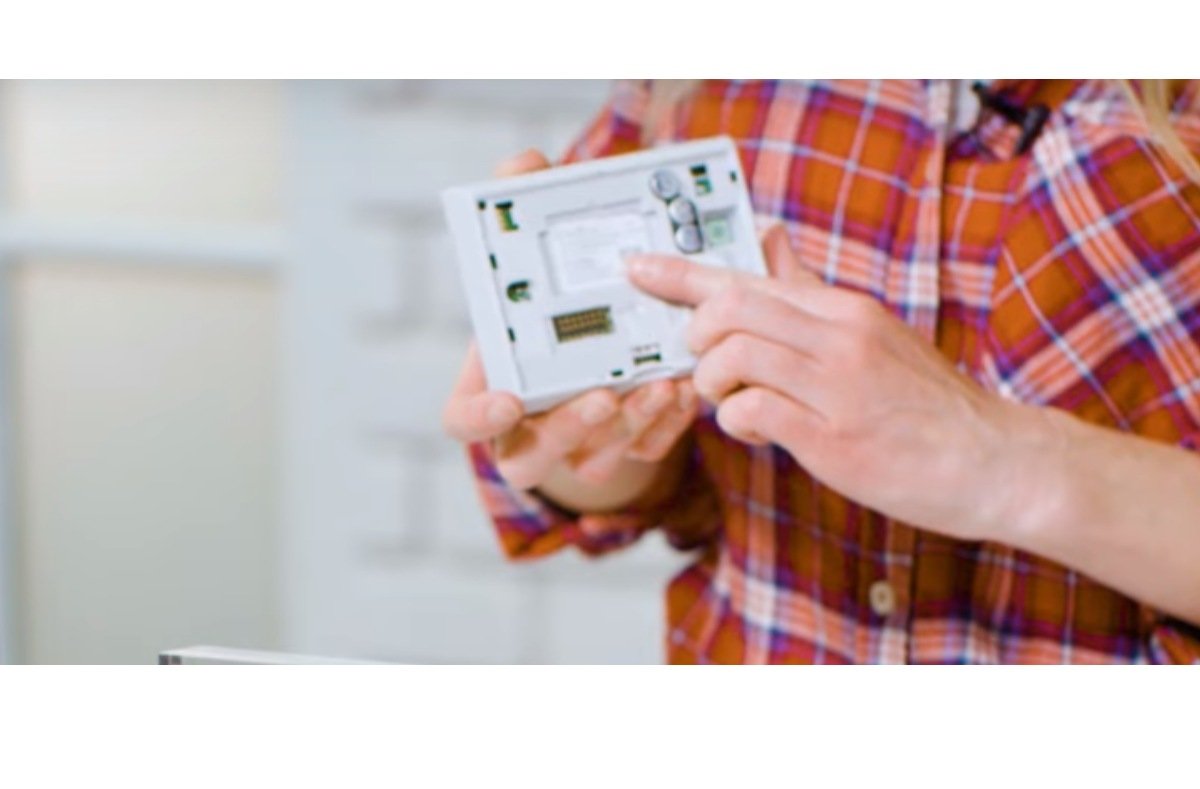
Now, let’s proceed to the instructions for different Honeywell thermostat models:
Smart Power for T10 Pro & T9
Get ready to meet the stars of the show – the T10 Pro and T9 thermostats by Honeywell. These buddies are like power champs – they don’t need battery swaps. They’re cool because they draw power from the HVAC transformer using the C wire, running on a 24-volt supply.
Sensor Magic with Batteries: But wait, there’s more! These thermostats have these smart wireless indoor sensors. They’re like the guardians of comfort. And guess what powers them? AAA alkaline batteries!
Battery Hints and Alerts: Watch out for the thermostat screen – it’s your battery buddy. It usually sends you battery warnings about 60 days before the batteries wave goodbye.
Low Battery Flash: Uh-oh, if the sensor’s status light starts flashing red, it’s a sign. The battery’s almost done for – about 2-3 weeks of life left. The status light stays off during regular operation when it’s all okay.
Change the Sensor Batteries: Ready for a battery makeover? Here’s the plan:
- Peek Inside: Take off the sensor cover. It’s like opening a door to battery magic.
- Fresh Power: Put in two new AAA alkaline batteries. It’s like giving your sensor a snack!
- Lights On: After you pop in the new batteries, the status light will flash green if they’re good to go. If they need a switch, it will be red.
- Cover the Magic: Put the cover back on, and guess what? Your sensor will high-five the thermostat in just a few seconds. Magic!
- Top-Notch Batteries: Remember, use shiny new AAA alkaline batteries for the best performance and a long, happy life for your T10 Pro or T9 thermostat. They’ll thank you!
There you go – a battery swap guide to keep your sensor rocking and your comfort top-notch!
T6 Z-Wave
The T6 Z-Wave thermostat offers flexibility in power source, functioning with either battery power (using 3 x AA batteries) or 24 VAC power through a “C” or common wire.
Battery usage is optional: batteries can act as backup power when the thermostat is wired to run on 24 VAC, although they’re not necessary.
All non-battery-operated Z-Wave devices in the network serve as repeaters, ensuring a reliable connection.
For optimal functionality, replace the thermostat batteries promptly when the low-battery alert appears, typically around two months before depletion.
You can replace the battery of a Honeywell T6 Z-Wave thermostat by:
- Locating the battery compartment.
- Opening the compartment using a screwdriver or latch release tool.
- Removing the old batteries and disposing of them properly.
- Inserting fresh batteries of the same type ensures correct polarity.
- Closing the battery compartment securely.
- Testing the thermostat to ensure it powers on and displays the correct settings.
- Reconfiguring the Z-Wave network if needed, following the manufacturer’s instructions.
T4 Pro: Your Smart Saver
Meet the T4 Pro – your ticket to saving energy like a pro. Its smart tech is here to cut those energy costs down. And the best part? It’s not just smart; it’s super clear and accurate, ensuring your home has the right temperature. Plus, it matches most heating and cooling systems – a true all-rounder!
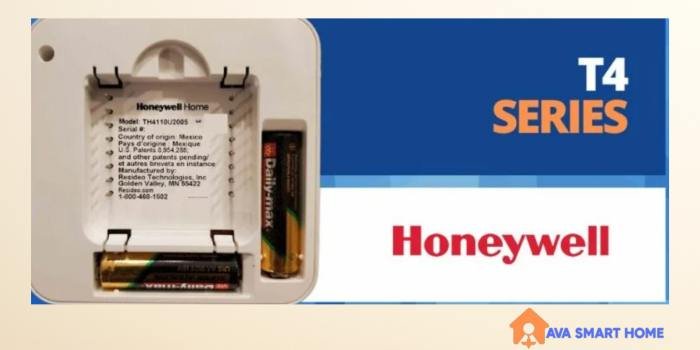
Power Your Way:
The T4 Pro gives you options. You can wire it up with AC power or go the battery route with 2 AA buddies. Whatever suits you, it’s ready to roll. And guess what? Changing those batteries is a breeze.
Battery Swap Magic:
Ready for the battery makeover? Here’s how to do it:
- Uncover the Secret: Find that battery compartment cover and gently take it off. It’s like opening a little treasure box.

- Out with the Old: Say goodbye to the old batteries. Take them out carefully.
- New Battery Love: Pop in the fresh AA batteries, but remember – to match the plus and minus signs to the marks, like fitting puzzle pieces together.
- Seal the Deal: Put the battery compartment cover back on like you’re sealing up that treasure box. Click!
- Power Check: Turn on the thermostat and ensure it’s all smiles – that means it’s working like a champ.
There you have it – a quick battery swap for your T4 Pro thermostat. Let’s keep that energy-saving magic going!
A Battery Upgrade: 5000 Series
Get ready for the future with the amazing 5000 Series! This bunch brings a cool new trick – a sliding battery compartment slot. And guess what? You won’t need to separate the cover plate from the base plate to change the battery. Easy peasy, right?
Changeover Magic: But wait, there’s more! The 5000 Series is all about that Auto Changeover feature. Imagine needing heat and cool in a single day – it’s like having Mother Nature on your side. This feature automatically picks either heating or cooling based on what your indoor space needs. Smart, huh?
Meet the Crew: Say hello to the stars of the show – Focus Pro, TH5110D, TH5320U & TH5220D. They’re all set to bring comfort and style to your home.
Boost Up with Batteries: Time for the battery swap dance – here’s how:
- Power Down: First things first, turn off your thermostat. Safety first, my friend!
- Battery Spot: Find the battery holder at the top-right corner of the cover plate. Give it a press and a gentle pull – it’s like opening a secret door.
- Out It Goes: Take out the battery compartment like you’re solving a puzzle. Out with the old!
- New Power: Put in two fresh AA batteries. Here’s the tip: match the plus and minus signs to the marks inside the compartment.
- Cover Up: Slide the cover plate back onto the base plate. Like putting the lid on a treasure chest!
- Power Up Again: Flip the switch and turn on your thermostat. Ta-da! It’s now rocking with brand-new batteries.
That’s a quick battery change to keep your 5000 Series thermostat in tip-top shape. Ready for cozy days and nights!
8000 Series
The 8000 series features a touchscreen controller and Wi-Fi compatibility, offering advanced control over humidity, ventilation, and program scheduling through your smartphone.
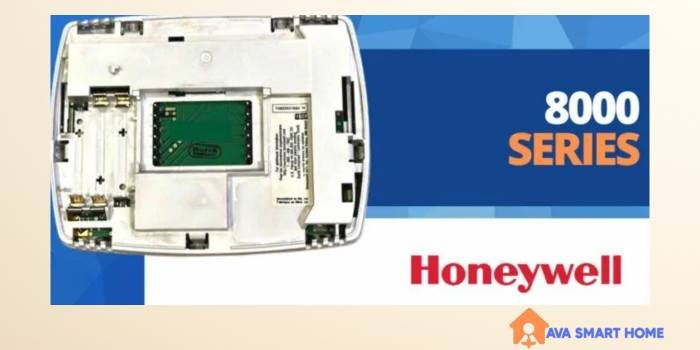
This series includes models TH8110U, TH8320U & TH8321U.
To ensure your 8000 series thermostat remains operational:
- Turn off the thermostat.
- Gently pull the cover plate from the base plate.
- Replace all three AAA batteries, aligning with the battery compartment markings.
- Reattach the cover plate to the base plate.
- Power on the thermostat to restore its functionality.

6000 Series
The 6000 series introduces a sliding battery slot and an improved control system compared to earlier models.
This series includes models.
TH6110D, TH6220D & TH6320U.
To change the battery of a Honeywell 6000 series thermostat:
- Turn off the thermostat.
- Press and pull the cover plate to remove the battery holder at the top-right corner.
- Take out the battery compartment.
- Replace both AA batteries.
- Attach the cover plate back onto the base plate, sliding it firmly.
- Power your thermostat back on.
A Battery Upgrade: 5000 Series
Get ready for the future with the amazing 5000 Series! This bunch brings a cool new trick – a sliding battery compartment slot. And guess what? You won’t need to separate the cover plate from the base plate to change the battery. Easy peasy, right?
Changeover Magic:
But wait, there’s more! The 5000 Series is all about that Auto Changeover feature. Imagine needing heat and cool in a single day – it’s like having Mother Nature on your side. This feature automatically picks either heating or cooling based on indoor space needs. Smart, huh?
Meet the Crew:
Say hello to the stars of the show – Focus Pro, TH5110D, TH5320U & TH5220D. They’re all set to bring comfort and style to your home.
Boost Up with Batteries:
Time for the battery swap dance – here’s how:
- Power Down: First things first, turn off your thermostat. Safety first, my friend!
- Battery Spot: Find the battery holder up at the top-right corner of the cover plate. Give it a press and a gentle pull – it’s like opening a secret door.
- Out It Goes: Take out the battery compartment like you’re solving a puzzle. Out with the old!
- New Power: Put in two fresh AA batteries. Here’s the tip: match the plus and minus signs to the marks inside the compartment.
- Cover Up: Slide the cover plate back onto the base plate. Like putting the lid on a treasure chest!
- Power Up Again: Flip the switch and turn on your thermostat. Ta-da! It’s now rocking with brand-new batteries.
That’s a quick battery change to keep your 5000 Series thermostat in tip-top shape. Ready for cozy days and nights!
Elevate Your Comfort: 4000 Series
Get ready to level up your comfort game with the amazing 4000 Series. Like its cool predecessors, this series is about keeping your compressor safe and sound. Plus, it’s your sidekick for setting the perfect temperature, controlling the fan, and even handling emergency heating – all thanks to the nifty control system.
Brighter and Smarter Display:
What’s even cooler? The upgraded LED display! It’s like having a mini information hub. It tells you when the battery needs some love and spills the beans on the indoor temperature, the day and time, and even your system’s status. Talk about smart!
Meet the Crew:
Let’s warmly welcome the 4000 series heroes: TH4210D & TH4110D. These guys are all set to keep you comfy and energy-savvy.
Battery Boost Magic:
Now, let’s dive into the magical world of changing batteries:
- Safety First: Turn off your thermostat and make sure the circuit is all tucked in safely – just a precautionary measure.
- Easy Slide: Put your fingers at the bottom of the thermostat and give it a gentle pull to take off the cover plate. It’s like revealing a secret!
- Swap the Power: Out with the old and in with the new! Replace both AA batteries with fresh ones, ready to rock.
- Match the Signs: Here’s the secret sauce – match the battery markings with the ones in the compartment. Easy-peasy.
- Secure the Secret: Slide the cover plate back on the base plate. Slide, click – it’s like putting together a cozy puzzle.
- Power Up: Turn on the thermostat and let the magic unfold. Your home is all set for that comfy, energy-efficient vibe.
There you have it – a quick battery swap for your 4000 Series thermostat. It’s like giving your home a big, comfy hug!
3000 Series
The 3000 series stands out with its built-in compressor protection feature and control system display.
In this series, the control system and display screen are integrated.
Stay Protected with Compressor Care:
Guess what makes this series super special? It comes with a cool built-in compressor protection feature. This superhero feature covers your air conditioner and heat pump’s compressors. And that’s not all – it also hosts a control system and a display screen.
Batteries for Steady Power:
The 3000 series is like a genius. It uses batteries to handle all the ups and downs in AC power. But here’s the deal – these batteries might need a swap once a year. No biggie, though – you’ll get a heads-up alert 2 months before they run out completely.
Upgrade for a Smooth Ride:
Do you want your Honeywell Thermostat 3000 series to be the show’s star all year? Give it a power-up by changing the battery. In this series, we’ve got awesome models like TH3110D1008 and TH3210D1004.
Now, let’s get into action mode for the battery swap:
- Safety First: Turn off the thermostat and isolate the circuit for safety.
- Gently Does It: Carefully pull the bottom of the thermostat to separate the cover plate from the base plate.
- Battery Swap: Take out the old batteries and pop in the new ones, ensuring they’re facing the right way.
- Cover Magic: Slide the cover plate back onto the base plate.
- Power On: Turn on the thermostat and circuit, bask in uninterrupted climate control in your home.
There you go, a simple battery swap to keep your thermostat rocking!


Simple Comfort with RTH2300/RTH221 Series
Get ready to meet your new comfort companion – the Honeywell RTH2300/RTH221 Series! This programmable thermostat is here to make your home cozier and more energy-efficient.
Easy as ABC:
This series is all about being easy-peasy. With its smooth design and super-friendly interface, you can tell your thermostat exactly how you want things. Want it warm in the morning and cool in the afternoon? No problem! You’re the boss. And the best part? It knows how to keep your space comfy without using too much energy.
Meet the Gang:
We’ve got some cool members in this series: RTH2300B, RTH2300, RTH221. They’re all about bringing you comfort without the hassle.
Battery Swap Magic:
Now, let’s talk about giving your thermostat a battery boost. Here’s the how-to:
- Uncover the Secret: Flip that thermostat over and find the battery compartment. It’s like uncovering a treasure chest!
- Out with the Old: Say goodbye to those tired old batteries. Take them out gently.
- New Battery Love: Pop in the new batteries, but here’s the trick – make sure they’re facing the right way, like fitting puzzle pieces.
- Seal the Deal: Close the battery compartment like you’re sealing a secret letter. Click!
- Power Check: Turn the thermostat on and ensure it’s all smiles – it’s working like a charm.
That’s it! A quick battery change to keep your thermostat in tip-top shape. Your comfort, your way.

Budget-Friendly Comfort: 1000 & 2000 Series
Let’s dive into the world of Honeywell’s 1000 and 2000 series thermostats – perfect for folks who want comfy vibes without breaking the bank. These buddies are like the stars of multi-family homes and apartment hangouts.
Bright and Easy Control:
One thing you’ll love? The LED display on every model in this series. It’s like your thermostat speaking your language. Whether you’re cooling things down or warming them up with your air conditioner or gas furnace, these thermostats are the real deal.
Meet the Crew:
Say hello to the 1000 series crew: TH1100DV, TH1110DV, TH1210DV. And don’t forget the 2000 series stars: TH2110DV and TH2210DV. They’re all about making your comfort a top priority.
Battery Swap – Easy Peasy:
Let’s talk about giving your thermostat a battery makeover. Follow these simple steps:
- Take It Easy: Gently remove the cover plate from the base plate. It’s like opening a book to a cool adventure.
- Swap the Oldies: Say goodbye to the tired old AAA batteries. Swap them for fresh ones that are all ready to go.
- Match the Magic: Put the new batteries in, but remember the secret – match the plus and minus signs like the battery compartment marks.
- Seal the Deal: Pop the cover plate back on the base plate like you’re closing a secret treasure chest. Click!
- Switch On the Fun: Turn on the thermostat and the circuit. Now, you’re all set for a cozy journey ahead.
That’s the ticket! A quick battery change and your thermostat will keep you comfy. Let the good vibes flow!

Conclusion
Honeywell thermostats offer many models designed to suit different needs and preferences. Whether you have the advanced T10 Pro or the user-friendly 5000 series, understanding how to change the batteries is crucial for maintaining their optimal functionality.
Following the instructions outlined in this guide and referring to the model-specific diagrams, you can confidently replace the batteries in your Honeywell thermostat. Always prioritize safety; if you have any doubts, don’t hesitate to seek professional help. With proper maintenance, your Honeywell thermostat will continue to provide accurate temperature control and energy efficiency for your home.
Related: