


If you’ve recently purchased the Eufy Indoor Cam 2K Pan & Tilt, congratulations on choosing a top-notch home security camera! This powerful device can help you keep an eye on your home, pets, or loved ones with its advanced features. One essential aspect of setting up your Eufy Indoor Cam 2K is installing an SD card to store video recordings.
In this comprehensive guide, we will describe you through the process step by step, ensuring a perfect installation experience.
Related: Eufy Indoor Cam 2k Pan & Tilt P24 Review
Why Install an SD Card?
Before we start the installation process, let’s understand why adding an SD card to your Eufy Indoor Cam 2K Pan & Tilt is a smart move:
- Local Storage: An SD card provides on-site storage for your camera’s video recordings, eliminating the need for cloud subscriptions and ensuring your data is within your control.
- Cost-Effective: It’s a cost-effective way to expand your storage capacity, as SD cards are relatively inexpensive compared to cloud storage plans.
- No Monthly Fees: By using an SD card, you can say goodbye to monthly subscription fees, which can add up over time.
- Privacy: Storing videos locally enhances your privacy by reducing the risk of third-party access to your footage.
Now, let’s get started with the installation process.
What You’ll Need
Before you begin, make sure you have the following items ready:
- Eufy Indoor Cam 2K Pan & Tilt
- A microSD card (up to 128GB, Class 10 or higher recommended)
- A paperclip or SIM ejector tool (for the reset button)
- A stable Wi-Fi network
- A smartphone or tablet with the Eufy Security app installed
Step-by-Step Installation
Follow these steps carefully to install an SD card in your Eufy Indoor Cam 2K Pan & Tilt:

Step 1: Power Off
Ensure the camera is powered off. You can do this by unplugging it or disconnecting the power source.
Step 2: Locate the SD Card Slot
Locate the SD card slot on your Eufy Indoor Cam 2K. It’s usually on the bottom or side of the camera, covered by a rubber flap.
Step 3: Insert the SD Card
- Take your microSD card and insert it into the slot. Make sure it clicks into place.
- If the card is correctly inserted, you should feel a slight resistance when pushing it in.
Step 4: Power On the Camera
Plug in or reconnect the power source to turn the camera on.
Step 5: Check the Eufy Security App
- Open the Eufy Security app on your smartphone or tablet.
- Tap on the camera you’ve just installed the SD card into.
- Go to the camera’s settings menu by tapping on the gear icon.
- In the camera settings, look for the “Storage Settings” or “SD Card Settings” option.
- Configure your preferences for video storage. You can choose to record continuously or only when motion is detected.
- Make sure to select the SD card as the storage location.
Related: 6 Best Spy Camera with Longest Battery Life- 24 Hour Battery
I inserted a card into the camera, and it promptly detected it. However, it then displayed a message advising me to back up any important data because it would reformat the card rather than simply creating its own directory. Apparently, it uses a non-standard file system format, preventing me from easily mounting the card on a PC to copy video clips.
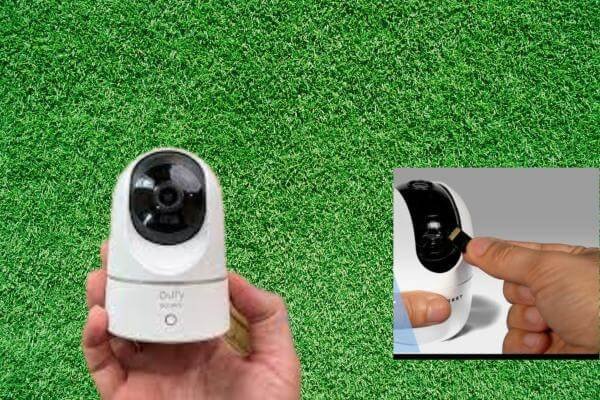
Now, here’s where things got tricky. There seemed to be no option to tilt the camera back up, making it impossible to remove the card for backup. Even when I went back and selected the microSD card option again, it led me to the same format screen. This left me with no choice but to manually point the camera up and try to pull the card out, all while it constantly moved around as I attempted to do so.
Later on, I discovered a workaround. Turning the camera off within the settings menu caused it to automatically point upwards, granting me reliable access to the card slot.
It’s clear that there’s room for improvement in this process:
- Provide clear documentation on how to access the card slot, such as turning the camera off via the app.
- During the initial setup, prompt users to point the camera up and insert the card if they want to use one, and issue a warning to back up any data on it because it will be erased.
Overall, I must admit that I’m not entirely impressed with this aspect of the camera, especially when compared to Wyze. Wyze has its own set of issues, particularly with clip playback, which I find to be quite abysmal, but that’s a topic for another discussion.
Step 6: Format the SD Card (Optional)
If this is a new SD card or one you haven’t used with your camera before, it’s a good idea to format it within the Eufy Security app. This ensures compatibility and optimal performance.
Step 7: Test the Recording
To ensure everything is working correctly, trigger a test recording. Walk in front of the camera or create some motion to see if the camera starts recording and saving footage to the SD card.

Troubleshooting Tips
- If you encounter any issues during installation or formatting, consult the Eufy Indoor Cam 2K Pan & Tilt user manual for specific troubleshooting guidance.
- Ensure your Wi-Fi connection is stable and that the camera is within range of your router.
- Regularly check the available storage space on the SD card and clear old recordings if needed to prevent it from becoming full.
By following these steps, you can successfully install an SD card in your Eufy Indoor Cam 2K Pan & Tilt, providing you with a reliable and cost-effective storage solution for your home security needs. Enjoy the peace of mind that comes with knowing your valuable video recordings are securely stored right at home, all without any monthly fees.