


The Things We Like in Blink Outdoor Wireless Weather Resistant HD Security Camera
-
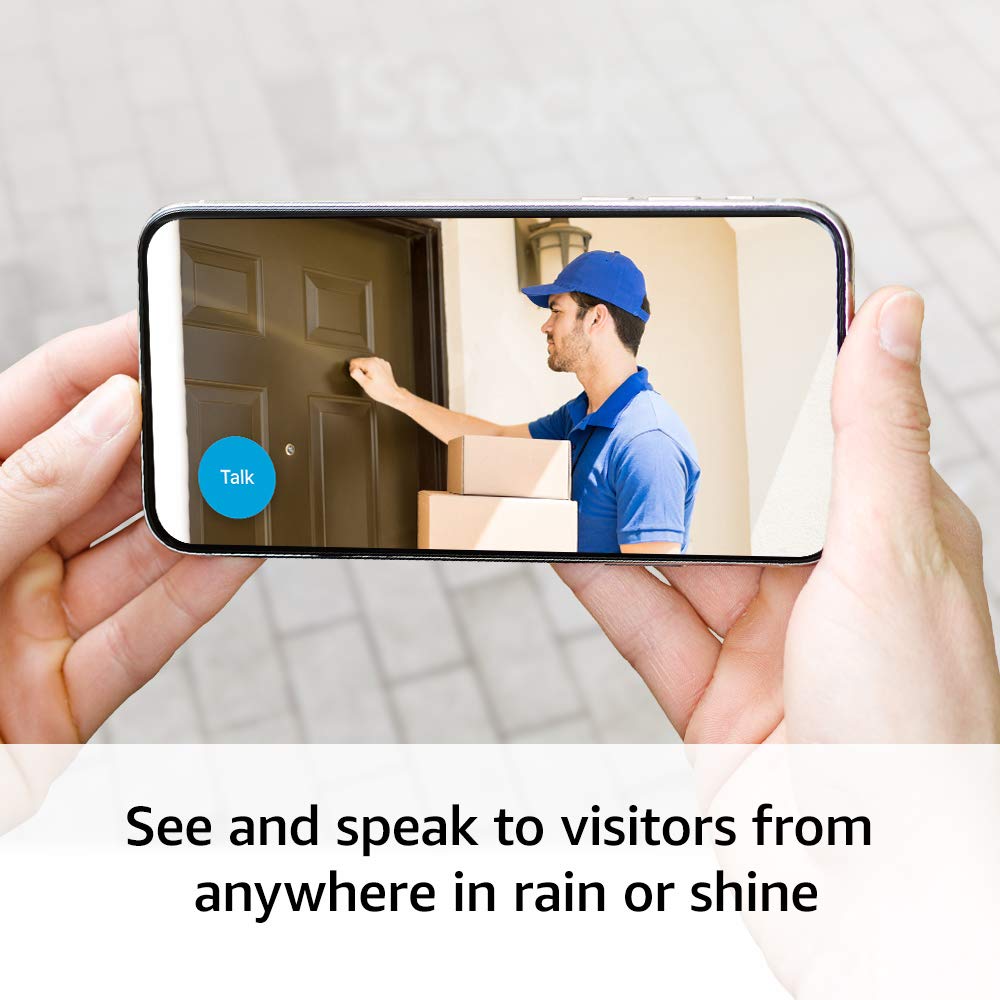
Two-way audio: Thanks to the speakers and microphone of the Blink Outdoor, we were able to communicate with delivery people or repair workers in real-time.
-
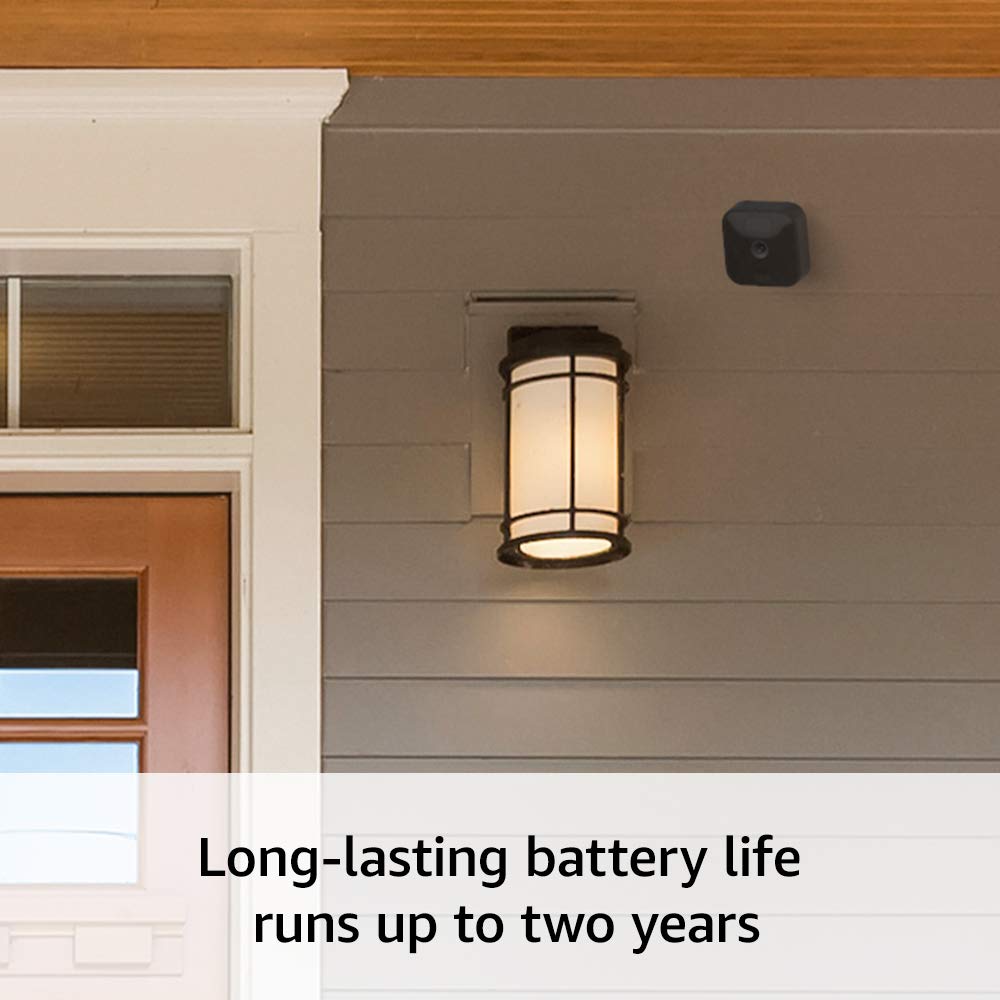
Two-year battery life: Two little AA batteries will keep the Blink Outdoor running for about two years.
-
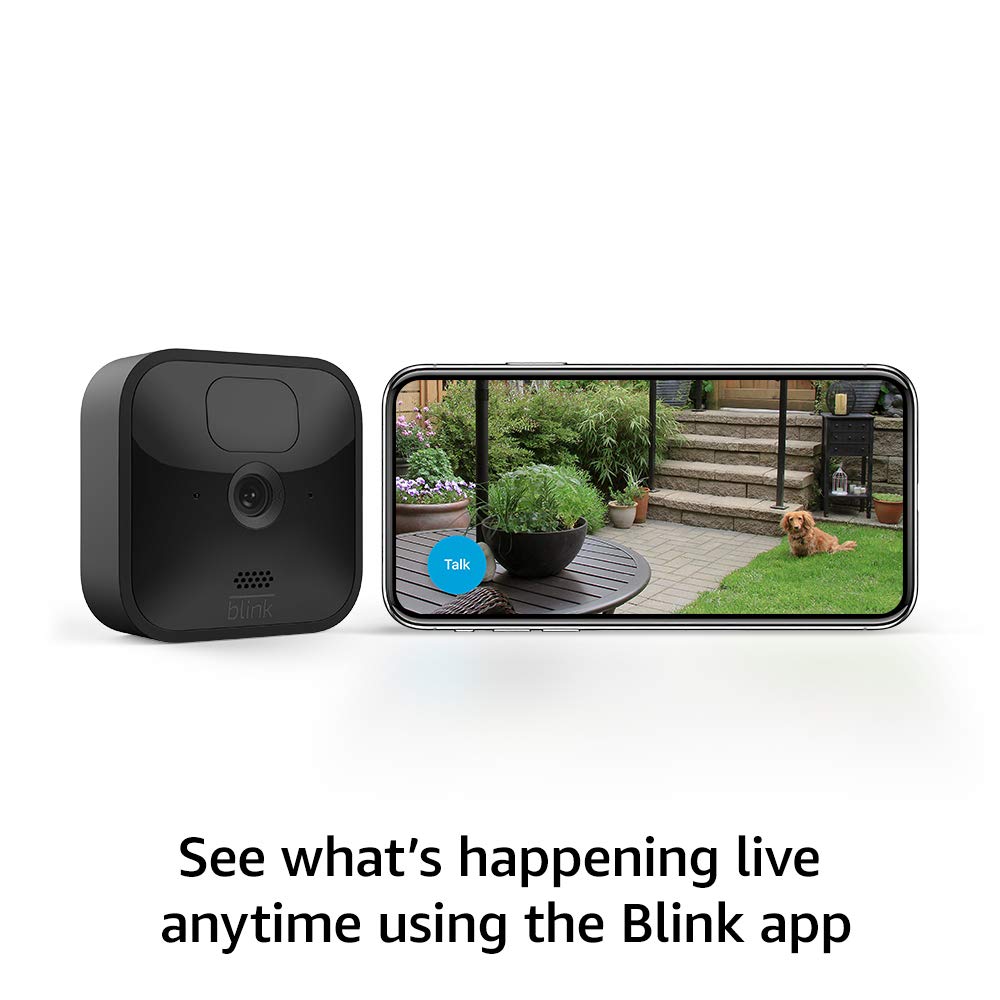
Excellent video performance: We were impressed with the quality of the 1080p HD video on Blink Outdoor.
The Things We Do Not Like
-
We had to tap the “continue” button every 30 seconds even within that short five-minute timeframe because the Blink Outdoor camera can only stream live for five minutes at a time.
-
We were disappointed with the night vision of the Blink Outdoor, which lacked a second infrared sensor, so rather than seeing familiar faces of visiting family members and friends, we saw only white glowing blobs.
-
The field of view of Blink Outdoor is quite narrow at 110 degrees; usually, we prefer cameras that have fields of view of at least 120 degrees.
![]()
The Bottom Line
Overall, the Blink Outdoor Wireless Weather Resistant HD Security Camera is a solid choice for anyone looking for a reliable and easy-to-use security camera for their home or property.
Its long battery life, high-quality video, and customizable motion detection make it a great value for its price. It has an impressive battery life of up to two months when used in conjunction with an AC adapter. Blink is also the best z wave outdoor camera.
Read also: Google Nest Camera vs Blink Outdoor (True Comparison)
Blink Outdoor 2 Camera System

This Product is Amazon’s Choice![]()
The Bestselling Blink Outdoor Camera, a 4.5-star rating out of 5, 112520 Reviews
Blink Outdoor Camera 3 Pack


Set up in Minutes – 3 Camera Kit
Pros
- Works with Alexa and IFTTT
- Sharp 1080p video
- Good battery life
- Local and cloud storage
- Easy to install
Cons
- Does not support HomeKit or Google Assistant
- Requires a hub
Blink Outdoor Specification
| Connectivity: | Wi-Fi |
| Integrations: | Amazon Alexa, IFTTT |
| Field of View: | 110 degrees |
| Resolution: | 1080p |
| Storage: | Cloud, Local |
| Two-Way Audio: | Yes |
| Mechanical Pan/Tilt: | No |
| Night Vision: | Yes |
| Alarm: | No |
If you’re in the market for a quality, weatherproof, and reasonably priced camera that can take great video but doesn’t require a subscription, check out the Wyze Cam.
We’re used to making loud, emotional comments about cameras when they don’t do everything we want them to, but the Wyze Cam doesn’t try to please anyone. In fact, it makes a point of making everyone happy. It’s a serious, serious contender for our top pick.
![]()
Blink Outdoor is the top entry in the Amazon Basics line of smart home products. It’s a smart product, but it doesn’t have the bells and whistles of other brands in its category. It costs $99.99 and can be purchased directly from Amazon. This is a top-rated product, but it doesn’t have all the bells and whistles of other smart home products in its price range. It’s a serious contender for our top pick.
Features and Design
Camera Design
The Blink Outdoor system comes with a 2.7-by-2.7-by-1.2-inch (HWD) camera and an even smaller 0.7-by-2.3-by-2.5-inch Sync Module (hub) that connects to your home Wi-Fi network.
-
Two-way audio: It’s really important to have two-way audio on your security cameras. Through the camera’s speakers and microphone, we could communicate in real-time with delivery people or repair guys. We could also warn intruders that we saw them. Often, just saying “Can I help you? ” in a firm voice is all it takes to convince potential troublemakers to leave quickly, as we found in multiple instances.
-
Two-year battery life: The two-year battery life is possible thanks to the camera’s low-power consumption technology and the fact that it only records when motion is detected. That way, the camera is only using power when it needs to, which reduces battery drain.
-
Solid video performance: The camera was able to take clear pictures from afar, but the level of detail was not enough to identify the bird. With digital zoom, the image was able to be magnified four times and capture the finer details, but it still could not tell us the specific type of bird it was.
-
Motion detection sensitivity: By adjusting the motion detectors, the Blink Home app was able to detect motion and alert us to it without unnecessary notifications. However, since the camera does not have person detection, it could not tell the difference between people and other moving objects and animals, which could lead to false notifications.
-
Privacy zones: Privacy zones are especially useful for areas with high levels of activity, such as backyards. By creating zones to blackout, the camera is not constantly sending notifications and alerts about activity in the neighboring area. This ensures that the user’s privacy is respected, while still providing a level of security and surveillance for the user’s own property.
-
Local storage: By storing footage on a local flash drive, we can ensure that our footage is secure and protected from any potential cyber threats. We also have the option to access our footage without needing an internet connection, which is a great convenience.
-
Alexa integration: With Blink Outdoor, you can use your voice to quickly and easily access the features of your camera. It allows you to not only check your motion alerts, but also to control your camera, view footage, and more with just your voice. As Blink has some of the most extensive Alexa commands compared to other security cameras, it makes it an ideal choice for those who use Amazon’s smart home products.
No free cloud storage:
The Standard plan costs $3 per month or $30 per year and gives you one year of rolling storage for no more than three cameras. The Pro plan costs $5 per month or $60 per year and gives you two years of rolling storage for no more than 10 cameras.
The Unlimited plan costs $10 per month or $100 per year and gives you three years of rolling storage for no more than 20 cameras. The Advanced plan costs $15 per month or $200 per year and gives you four years of rolling storage for no more than 30 cameras.
Blink Home Monitor app:
Through the Blink Home Monitor app, you can control how often the app alerts you to incoming calls and messages. You can also control the volume level of notifications by clicking the Level Up option in the notification bar.
You can set the minimum and maximum volume levels for each app, as well as turn off all notifications that are not relevant to the current issue. Through the Blink Home Monitor app, you can control how often the app alerts you to incoming calls and messages.
With Blink Outdoor Wireless Weather Resistant HD Security Camera, you can control how often the app alerts you to incoming calls and messages. You can also control the volume level of notifications by clicking the Level Up option in the notification bar.
You can set the minimum and maximum volume levels for each app, as well as turn off all notifications that are not relevant to the current issue. You can view and control what is shown on the panel using the Blink App Tools menu. You can also trigger a motionless mode and control when the app displays a picture with motion detection.
Get it Now on Amazon (Blink Outdoor home security cameras)
How to Set up Blink Wireless Cameras and Performance
I can see everything from this point on because of the included high-definition video, but let’s start with the controls. The main control is a phone-sized LCD that shows a live view of the environment in front of you.
How to Set Up and Install a Blink Smart Camera
The Blink smart cameras are designed to make installation simple and straightforward, with no complicated wiring or expensive security service contracts.
The cameras are also easy to use, allowing you to control them from your smartphone or tablet. Plus, with the motion alerts, you can be aware of any activity in your home at all times.
How to Set Up the Blink App
Having a fast WiFi connection is important for Blink cameras because it needs to be able to quickly upload video footage to the cloud. If the upload speed is too slow, the footage won’t be uploaded in a timely manner. By testing the speed of your WiFi connection, you can make sure the Blink cameras will be able to work properly.
-
Download the Blink Home Monitor App. The app can be used to customize your Blink camera settings, receive motion and audio alerts, and watch recorded video clips. By scanning the QR code with your smartphone, you can quickly download the app and get started setting up your Blink camera.
-
Then open the app and tap Create Account.
-
Next, select your country and region. By selecting your country and region, you are telling the system which laws and regulations to adhere to. Your email address is needed to create an account and the password will be used to protect it.
-
Then enter your email address and create a password. cose and click “Verify Code”. Once it is verified, you will be able to log into your Blink account and start using the service.
-
Next, enter your verification code. Your email should contain a code that you can copy. Make sure your spam folder is checked if you do not see it. After that, tap Verify in the app and paste the code.
-
Then verify your phone number. After entering your phone number, you will receive a text message with a verification code. Tap the Voice Call option to receive a code over the phone.
-
Finally, choose if you want to link your Blink account to your Amazon account. The Skip option can also be found in the top-right corner of the screen. Linking your accounts will require you to enter your Amazon username and password.
You should set up your Sync Module now if you got one. With this device, you can record video to a USB drive and improve the battery life of your Blink cameras. A Sync Module is needed if you’re setting up multiple Blink cameras or if you have a Blink Outdoor camera.
How to Set Up Blink Sync Module
Tap the plus sign in the Blink Home Monitor app to set up a Sync Module. Follow the on-screen instructions after you pick Blink Wireless Camera System and scan the QR code.
Sync Modules aren’t included with most systems, so skip to the next section if you don’t have one.
-
The Blink Home Monitor app should be opened and the plus sign should be tapped. You will find this information in the top-right corner of the home page. In the event that you do not see this, please tap the home icon in the bottom-left corner of the screen.
It is recommended that you proceed directly to the next step if you are continuing from the previous steps.
-
You will then be prompted to select Blink Wireless Camera System.
-
The next step is to scan the QR code located on the back of the Sync Module. At the top of your device, there is an option to enter the serial number manually by tapping Enter Serial Manually.
-
Once you have created your Blink system, give it a name. Once you have completed the process, click the Next button.
-
Sync Module should then be plugged into a wall outlet. The sync module can be connected to the power adapter using the provided USB cable. Power is provided by the micro-USB port, while the video is recorded onto a thumb drive by the larger USB-A port.
-
When the green light turns on and the blue light begins to blink, wait for the green light to turn on. It is recommended that the bottom light be solid green, while the top light flashes blue as shown in the application.
Note: If the lights are not blinking properly, use a paperclip to press the reset button located above the USB-A port on the Sync Module.
-
You’ll then have to tap Discover Device.
-
Once you’re there, tap Join. BLINK-XXXX is the network name you’ll see on your device.
-
Click Join, then choose your WiFi network and enter your password.
-
You’ll need to wait until your device updates. Keep the Sync Module plugged in while it updates.
-
Let’s finish by tapping Done.
Sync Modules are easy to set up, but Blink cameras aren’t. Here’s what you need to do:
How to Set Up Your Blink Smart Cameras

Remove the back cover of your Blink cameras and put the batteries in. Tap the plus sign in the Blink Home Monitor app and select the model you want. You’ll see instructions on the screen.
-
Your Blink camera’s back cover needs to be removed. To do this, remove the rubber circle in the middle of the case. After you’ve unscrewed the back cover with the provided tools, lift it off.
-
You’ll need two AA batteries. Lithium-ion batteries are best for smart cameras because they last longer.
-
You’ll need to open the Blink Home Monitor app and tap the plus sign. There’s a link to it in the top-right corner of the home page. In the bottom-left corner, tap the home icon if you don’t see it.
-
Then pick a model of Blink camera.
-
Scanning the QR code inside the Blink camera is next.
You can add your camera to your Blink network if you have a Sync Module.
-
Tap Next when your camera updates. When your camera is done updating, you’ll see this in the top-right corner.
-
When you’re done, click Done.
-
Last but not least, screw the back cover on. Be sure to tighten the back cover of your Blink camera if you’re going to install it outside.
Blink Motion Sensor not Working
Motion detection must be enabled in the Blink camera settings for the camera to detect motion. Additionally, the camera must be “armed” or set to detect motion in order for the motion to be detected.
Low sensitivity settings may also prevent motion from being detected, as will turning on activity zones if motion is occurring outside of the zones. If the camera is too far away from the motion, it may not be able to detect it, and incorrect infrared settings can also prevent motion from being detected.
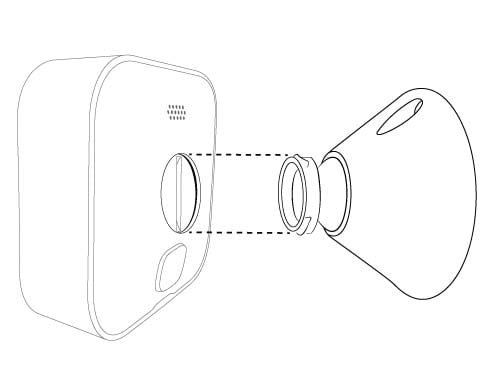
How to Mount Your Blink Camera
Blink cameras can be installed with the included mount after you set them up in the app. If you’re going to mount your Blink camera up high, you should screw the mount in first, then attach your camera.
It’s from Blink (Image Source)
Blink warns users not to install cameras near waving branches, crowded pathways, or roads. If you don’t, you’ll get motion alerts all the time. It’s always possible to set up motion activity zones and privacy zones later.
Cameras that blink can only detect motion up to 20 feet away, and they’re better at detecting horizontal motion. For example, if you want to get alerts every time someone walks down a path, you shouldn’t install your Blink camera facing down the path, but perpendicular to it.
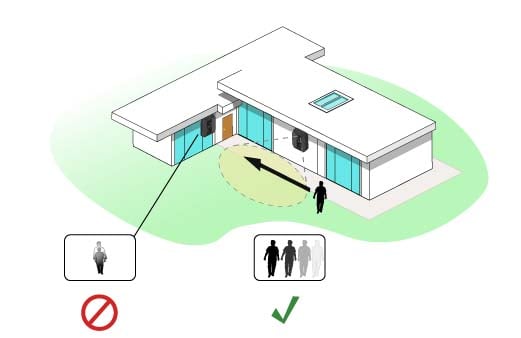
The image is from Blink (Source: Blink)
Try putting your Blink camera somewhere and taking a picture from it to figure out where it’s best to go. Move your Blink camera until you’re happy with it.
How to Set Up Motion Detection Alerts
At the bottom of your Blink Home Monitor home screen, select Armed to set up motion detection alerts. Just above each camera’s live view is a three-line icon you can tap to change your motion detection settings.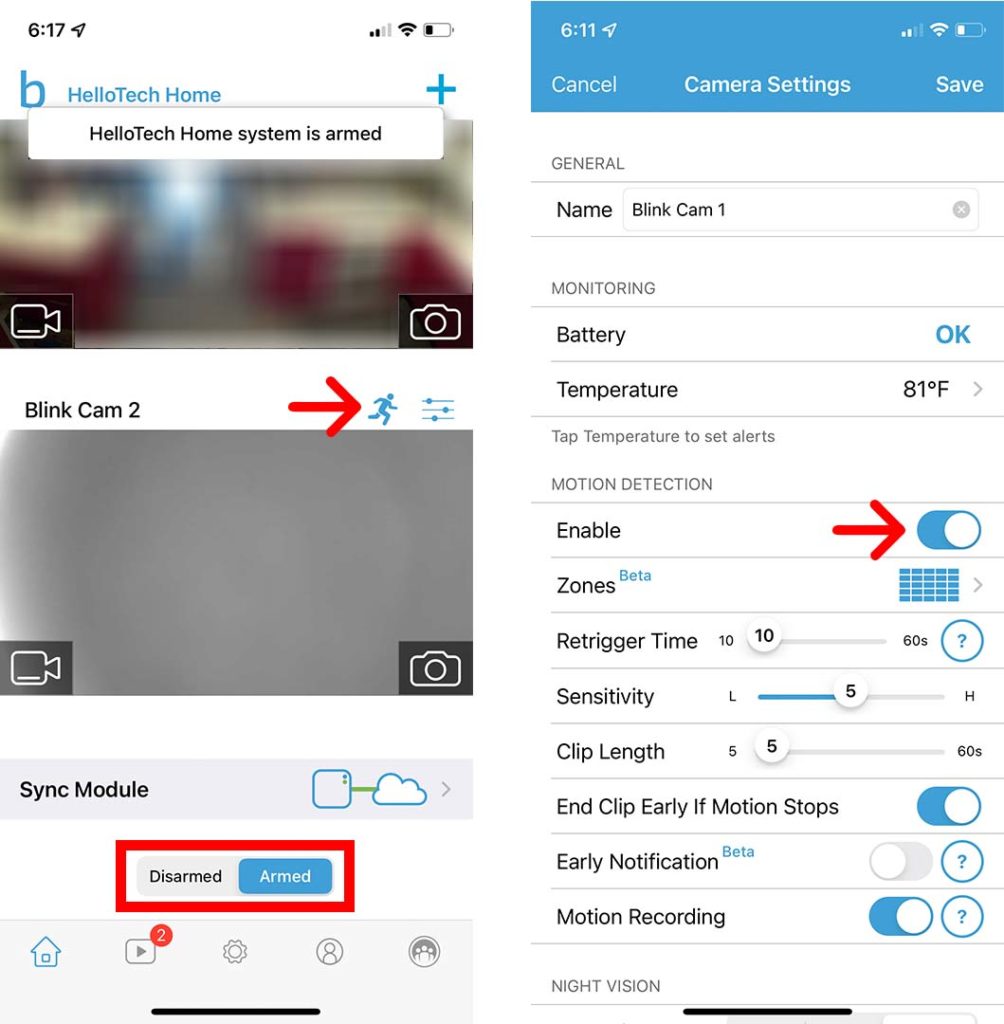
There’s a place where you can set up motion “Zones” to disable motion detection alerts. As well as changing your camera’s motion sensitivity and how long it takes to send you an alert after detecting motion, you can scroll down to customize other settings.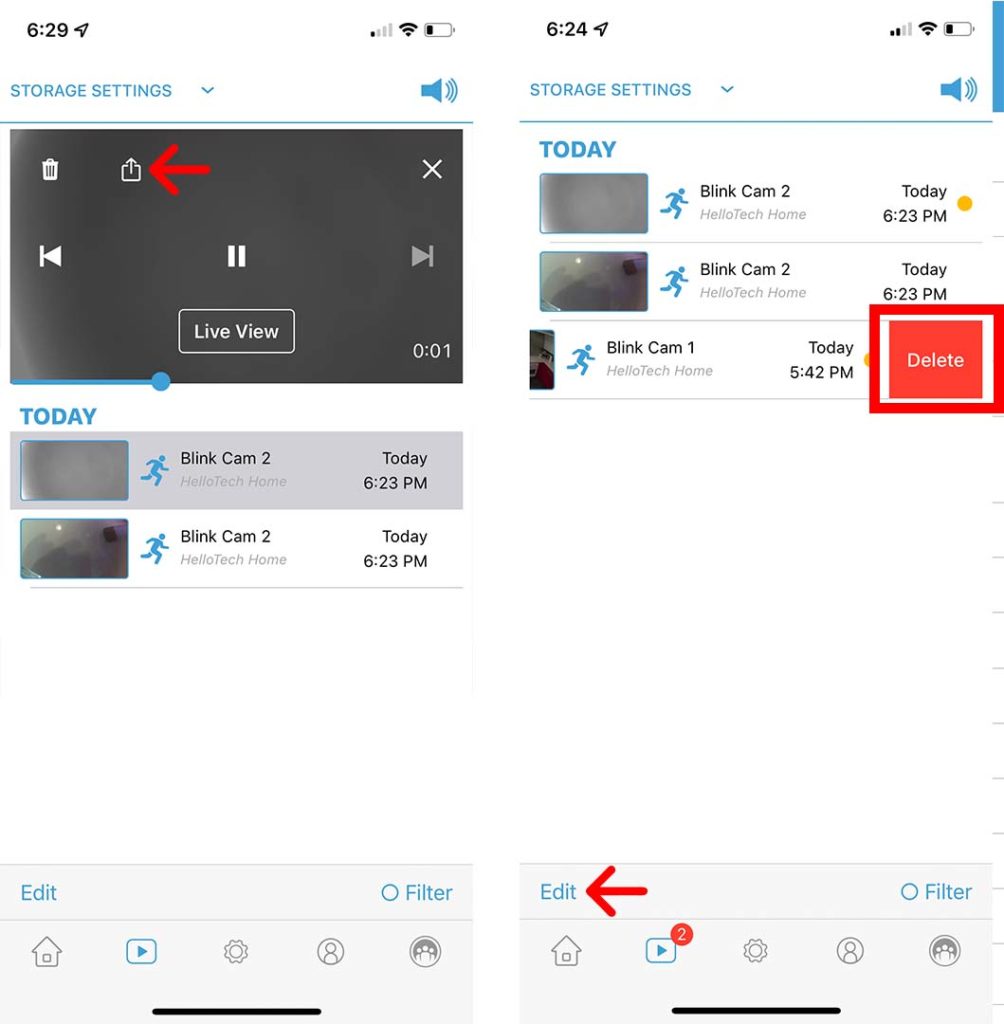
Please make sure the slider under Motion Detection and next to Enable is turned on if you want to receive motion detection alerts. Don’t forget to highlight the running man icon over your camera feed in dark blue.
Tap the gear icon at the bottom of your screen to change your motion detection settings. Select what type of notifications you want in Notification Options.
How to View Your Recorded Videos
Tap the Clip Roll icon at the bottom of the Blink Home Monitor app to see the videos your Blink cameras recorded. You can then pick a clip to watch.
You can share your video via email, text, and more by tapping the share icon. Swipe left and tap Delete to delete one clip. Alternatively, you can select Edit, Mark All, then Delete to delete everything at once.
Our step-by-step guide on how to turn on AirDrop and share your video clips with other Apple devices shows you how. You can share content securely and quickly between devices with a few taps.
Conclusions
The Blink Outdoor Wireless Weather Resistant HD Security Camera is a good value for outdoor security camera service. It requires a hub to connect to your network, comes in the box, and has a USB port for local video storage. There are several factors you consider when choosing an outdoor security camera, but this one is definitely worth considering.
The Blink Outdoor is only $114, and it offers better night vision and support for both Amazon Alexa and Google Assistant voice commands. It also supports third-party integrations via IFTTT applets and features a Travel Mode which allows you to take the camera on the road without the need for an internet connection.
Get the Low Price Blink Outdoor home security cameras 
More to Read—>